原子操作类
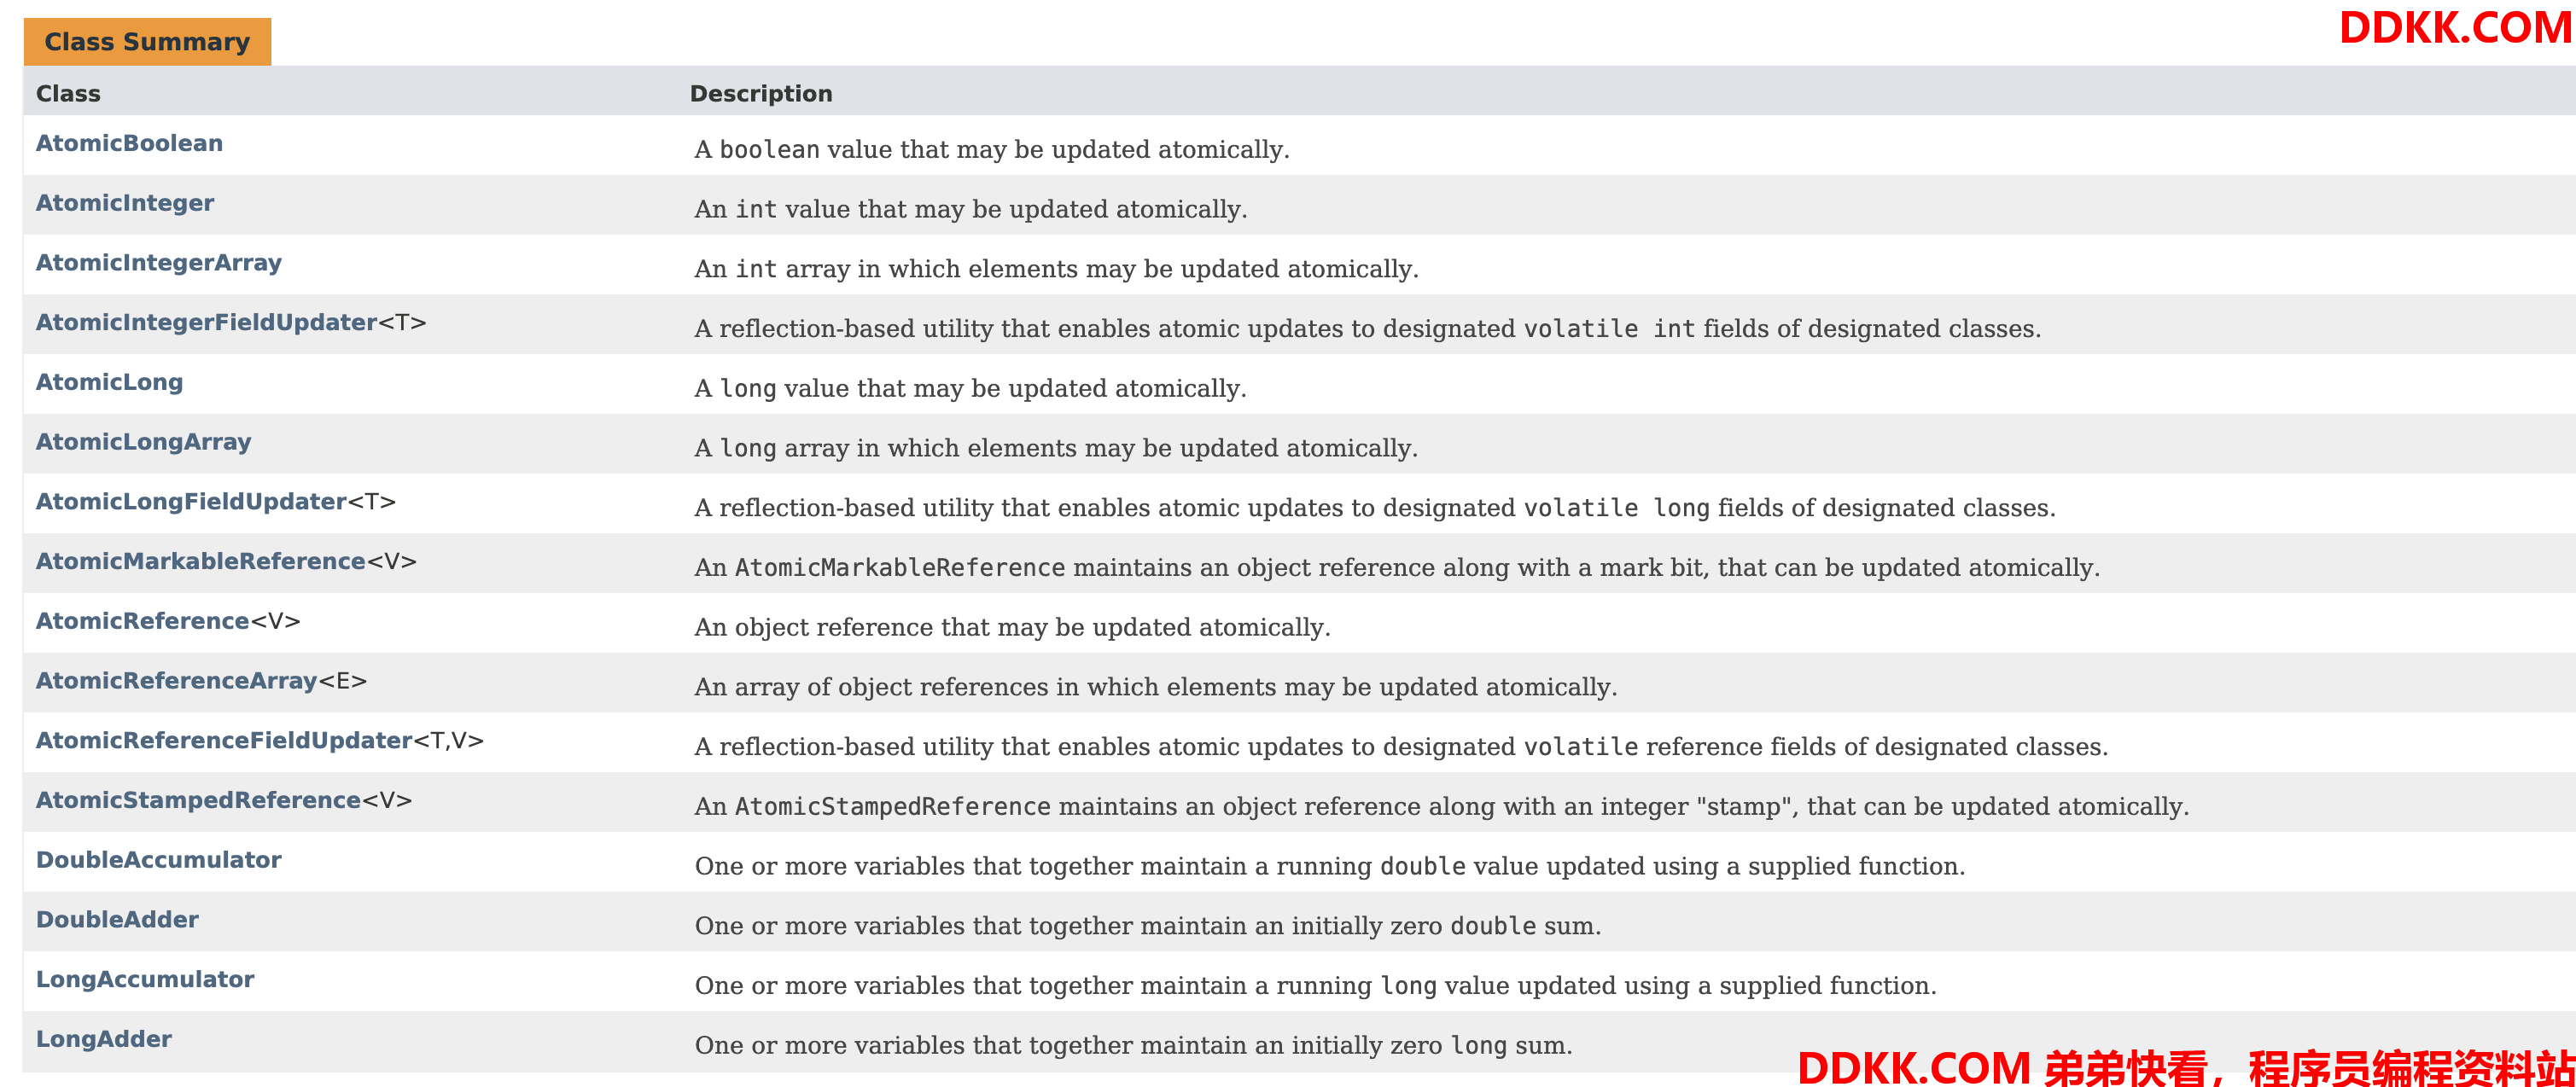
在并发编程中很容易出现并发安全的问题,有一个很简单的例子就是多线程更新变量i=1,比如多个线程执行i++操作,就有可能获取不到正确的值,而这个问题,最常用的方法是通过Synchronized进行控制来达到线程安全的目的。但是由于synchronized是采用的是悲观锁策略,并不是特别高效的一种解决方案。实际上,在J.U.C下的atomic包提供了一系列的操作简单,性能高效,并能保证线程安全的类去更新基本类型变量,数组元素,引用类型以及更新对象中的字段类型。atomic包下的这些类都是采用的乐观锁策略去原子更新数据,在java中则是使用CAS操作具体实现。
https://docs.oracle.com/javase/9/docs/api/java/util/concurrent/atomic/package-summary.html

我们将按照下面四大类依次讲解:
- 原子基本数据类型
- 原子数组
- 原子引用类型
- 原子更新字段类型
1.1 原子基本数据类型
种类
atomic包提供原子更新基本类型的工具类,主要有这些:
- AtomicBoolean:以原子更新的方式更新boolean;
- AtomicInteger:以原子更新的方式更新Integer;
- AtomicLong:以原子更新的方式更新Long;
AtomicInteger常用的方法:
- addAndGet(int delta) :以原子方式将输入的数值与实例中原本的值相加,并返回最后的结果;
- incrementAndGet() :以原子的方式将实例中的原值进行加1操作,并返回最终相加后的结果;
- getAndSet(int newValue):将实例中的值更新为新值,并返回旧值;
- getAndIncrement():以原子的方式将实例中的原值加1,返回的是自增前的旧值;
原理
public final int getAndIncrement() {


	return unsafe.getAndAddInt(this, valueOffset, 1);
}
可以看出,该方法实际上是调用了unsafe实例的getAndAddInt方法,unsafe实例的获取时通过UnSafe类的静态方法getUnsafe获取:
private static final Unsafe unsafe = Unsafe.getUnsafe();
Java中Unsafe类详解
java不能直接访问操作系统底层,而是通过本地方法来访问。Unsafe类提供了硬件级别的原子操作,主要提供了以下功能:
- 1、通过Unsafe类可以分配内存,可以释放内存;
- 2、可以定位对象某字段的内存位置,也可以修改对象的字段值,即使它是私有的;
- 3、挂起与恢复
将一个线程进行挂起是通过park方法实现的,调用 park后,线程将一直阻塞直到超时或者中断等条件出现。unpark可以终止一个挂起的线程,使其恢复正常。整个并发框架中对线程的挂起操作被封装在 LockSupport类中,LockSupport类中有各种版本pack方法,但最终都调用了Unsafe.park()方法。- 4、CAS操作
Unsafe类在sun.misc包下,Unsafer类提供了一些底层操作,atomic包下的原子操作类的也主要是通过Unsafe类提供的compareAndSwapInt,compareAndSwapLong等一系列提供CAS操作的方法来进行实现。
atomicInteger借助了UnSafe提供的CAS操作能够保证数据更新的时候是线程安全的,并且由于CAS是采用乐观锁策略,因此,这种数据更新的方法也具有高效性。
AtomicLong的实现原理和AtomicInteger一致,只不过一个针对的是long变量,一个针对的是int变量。而boolean变量的更新类AtomicBoolean类是怎样实现更新的呢?核心方法是 compareAndSet 方法,其源码如下:
public final boolean compareAndSet(boolean expect, boolean update) {


	int e = expect ? 1 : 0;
	int u = update ? 1 : 0;
	return unsafe.compareAndSwapInt(this, valueOffset, e, u);
}
可以看出,compareAndSet方法的实际上也是先转换成0,1的整型变量,然后是通过针对int型变量的原子更新方法compareAndSwapInt来实现的。可以看出atomic包中只提供了对boolean,int ,long这三种基本类型的原子更新的方法,参考对boolean更新的方式,原子更新char,double,float也可以采用类似的思路进行实现。
案例演示
使用:
public class AtomicIntegerTest {


    public static void main(String[] args) throws InterruptedException {


        AtomicInteger ai = new AtomicInteger();

        List<Thread> list = new ArrayList<>();
        for (int i = 0; i < 10; i++) {


            Thread t = new Thread(new Accumlator(ai), "thread-" + i);
            list.add(t);
            t.start();
        }

        for (Thread t : list) {


            t.join();
        }

        System.out.println(ai.get());
    }

    static class Accumlator implements Runnable {


        private AtomicInteger ai;

        Accumlator(AtomicInteger ai) {


            this.ai = ai;
        }

        @Override
        public void run() {


            for (int i = 0, len = 10; i < len; i++) {


                ai.incrementAndGet();
            }
        }
    }
}

1.2 原子数组
种类
atomic包下提供能原子更新数组中元素的类有:
- AtomicIntegerArray:原子更新整型数组中的元素;
- AtomicLongArray:原子更新长整型数组中的元素;
- AtomicReferenceArray:原子更新引用类型数组中的元素
这几个类的用法一致,就以AtomicIntegerArray来总结下常用的方法:
- addAndGet(int i, int delta):以原子更新的方式将数组中索引为i的元素与输入值相加;
- getAndIncrement(int i):以原子更新的方式将数组中索引为i的元素自增加1;
- compareAndSet(int i, int expect, int update):将数组中索引为i的位置的元素进行更新
可以看出,AtomicIntegerArray与AtomicInteger的方法基本一致,只不过在AtomicIntegerArray的方法中会多一个指定数组索引位i。
案例演示
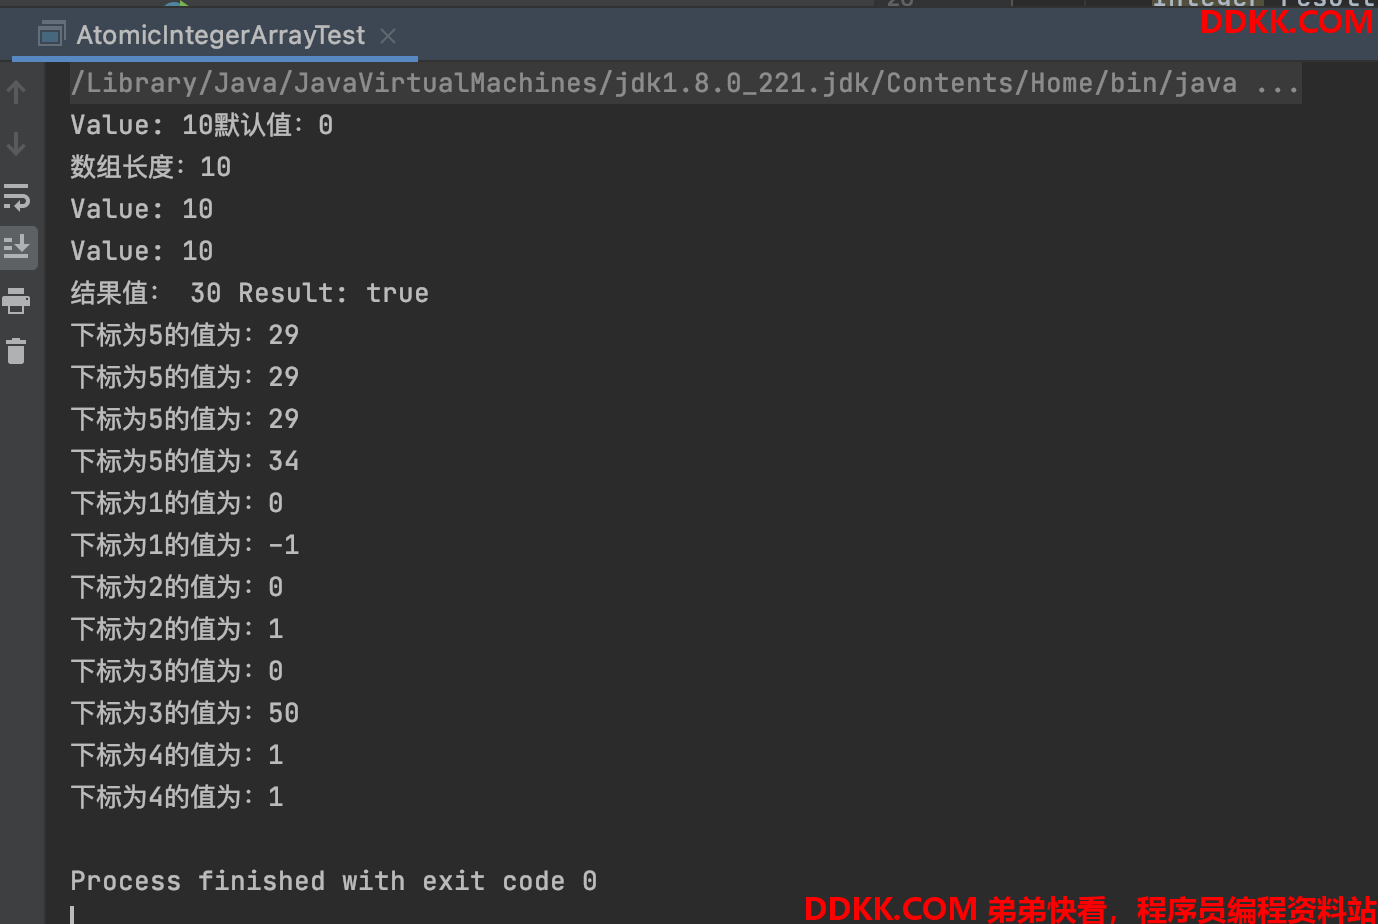
public class AtomicIntegerArrayTest {


    public static void main(String[] args) {


        //创建给定长度的AtomicIntegerArray。
        AtomicIntegerArray atomicIntegerArray = new AtomicIntegerArray(10);
        //将位置 i 的元素设置为给定值,默认值为0
        atomicIntegerArray.set(9,10);
        System.out.println("Value: " + atomicIntegerArray.get(9) + "默认值:" + atomicIntegerArray.get(0));
        //返回该数组的长度
        System.out.println("数组长度:" + atomicIntegerArray.length());
        //以原子方式先对给定下标加上特定的值,再获取相加后的值
        atomicIntegerArray.set(0,10);
        System.out.println("Value: " + atomicIntegerArray.get(0));
        System.out.println("Value: " +  atomicIntegerArray.addAndGet(5,10));
        //如果当前值 == 预期值,将位置 i 的元素设置为给定的更新值。
        Boolean bool = atomicIntegerArray.compareAndSet(5,10,30);
        System.out.println("结果值: " + atomicIntegerArray.get(5) + " Result: " + bool);
        //以原子方式先将当前下标的值减1,再获取减1后的结果
        System.out.println("下标为5的值为:" +  atomicIntegerArray.decrementAndGet(5));
        System.out.println("下标为5的值为:" + atomicIntegerArray.get(5));
        //以原子方式先获取当前下标的值,再将当前下标的值加上给定的值
        Integer result2 = atomicIntegerArray.getAndAdd(5,5);
        System.out.println("下标为5的值为:" + result2);
        System.out.println("下标为5的值为:" + atomicIntegerArray.get(5));
        //以原子方式先获取当前下标的值,再对当前下标的值减1
        System.out.println("下标为1的值为:" + atomicIntegerArray.getAndDecrement(1));
        System.out.println("下标为1的值为:" + atomicIntegerArray.get(1));
        // 以原子方式先获取当前下标的值,再对当前下标的值加1
        System.out.println("下标为2的值为:" + atomicIntegerArray.getAndIncrement(2));
        System.out.println("下标为2的值为:" + atomicIntegerArray.get(2));
        //将位置 i 的元素以原子方式设置为给定值,并返回旧值。
        System.out.println("下标为3的值为:" + atomicIntegerArray.getAndSet(3,50));
        System.out.println("下标为3的值为:" + atomicIntegerArray.get(3));
        //以原子方式先对下标加1再获取值
        System.out.println("下标为4的值为:" + atomicIntegerArray.incrementAndGet(4));
        System.out.println("下标为4的值为:" + atomicIntegerArray.get(4));

    }

}

并发测试:
public class AtomicIntegerArrayTest2 {


    static AtomicIntegerArray arr = new AtomicIntegerArray(10);
    public static class AddThread implements Runnable{


        public void run () {


        	for (int k = 0; k < 10; k++)
            	arr.getAndIncrement(k % arr.length());
    	}
    }

    public static void main(String[] args) throws InterruptedException {


        Thread[] ts = new Thread[10];
        for (int k = 0; k < 10; k++) {


            ts[k] = new Thread(new AddThread());
        }
        for (int k = 0; k < 10; k++) {


            ts[k].start();
        }
        for (int k = 0; k < 10; k++) {


            ts[k].join();
        }
        System.out.println(arr);
    }
}

1.3 原子引用类型
API介绍


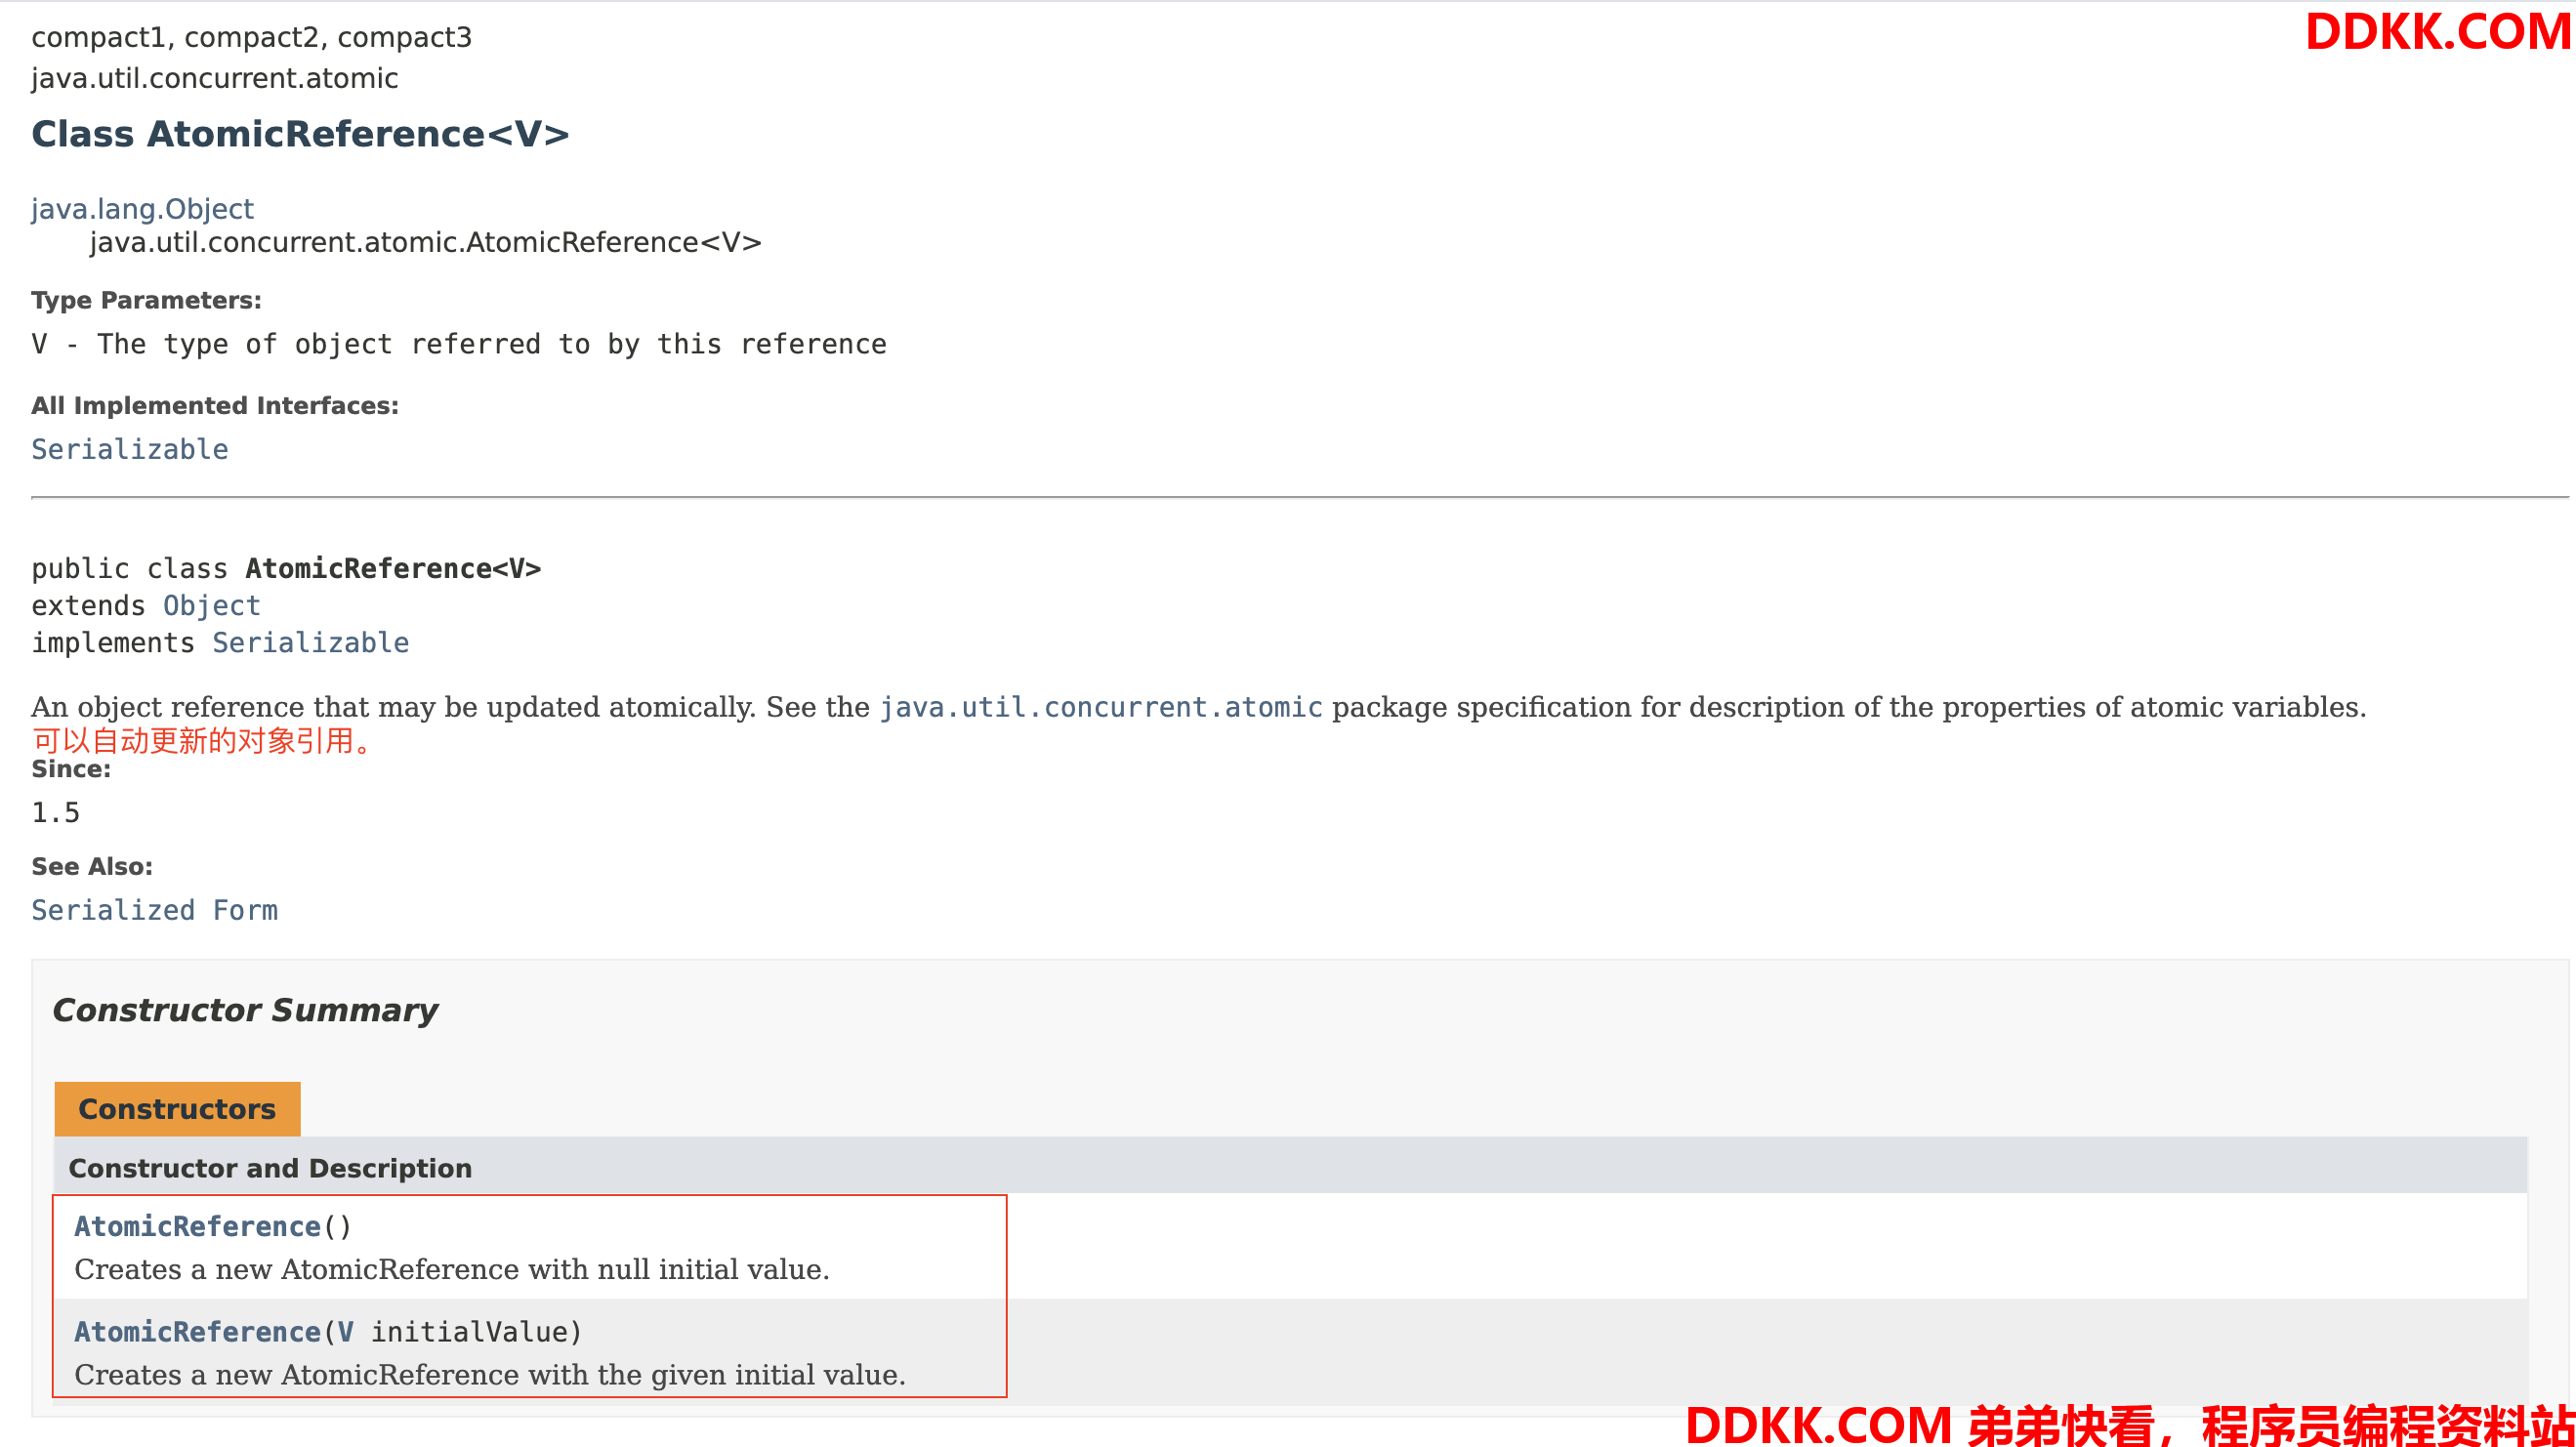
如果需要原子更新引用类型变量的话,为了保证线程安全,atomic也提供了相关的类:
- AtomicReference
- AtomicStampedReference
- AtomicMarkableReference
AtomicReference的引入是为了可以用一种类似乐观锁的方式操作共享资源,在某些情景下以提升性能。
源码简析
底层还是Unsafe,只不过是调用Unsafe的compareAndSwapObject方法:
public class AtomicReference<V> implements java.io.Serializable {


	...
    private static final Unsafe unsafe = Unsafe.getUnsafe();
    private static final long valueOffset;

    static {


        try {


            valueOffset = unsafe.objectFieldOffset
                (AtomicReference.class.getDeclaredField("value"));
        } catch (Exception ex) {

      throw new Error(ex); }
    }

    private volatile V value;

    //value被volatile修饰,所以get/set直接操作
    /**
     * Gets the current value.
     *
     * @return the current value
     */
    public final V get() {


        return value;
    }

    /**
     * Sets to the given value.
     *
     * @param newValue the new value
     */
    public final void set(V newValue) {


        value = newValue;
    }

	//底层还是通过unsafe的方法实现原子操作
    /**
     * Atomically sets the value to the given updated value
     * if the current value {@code ==} the expected value.
     * @param expect the expected value
     * @param update the new value
     * @return {@code true} if successful. False return indicates that
     * the actual value was not equal to the expected value.
     */
    public final boolean compareAndSet(V expect, V update) {


        return unsafe.compareAndSwapObject(this, valueOffset, expect, update);
    }

    /**
     * Atomically updates the current value with the results of
     * applying the given function to the current and given values,
     * returning the previous value. The function should be
     * side-effect-free, since it may be re-applied when attempted
     * updates fail due to contention among threads.  The function
     * is applied with the current value as its first argument,
     * and the given update as the second argument.
     *
     * 将给定函数应用到当前值和给定值的结果自动更新当前值,并返回前一个值。这
     * 个函数应该是没有副作用的,因为当尝试的更新由于线程间的争用而失败时,它
     * 可能会被重新应用。函数的第一个参数是当前值,第二个参数是给定的update。
     *
     * @param x the update value
     * @param accumulatorFunction a side-effect-free function of two arguments
     * @return the previous value
     * @since 1.8
     */
    public final V getAndAccumulate(V x,
                                    BinaryOperator<V> accumulatorFunction) {


        V prev, next;
        do {


            prev = get();
            next = accumulatorFunction.apply(prev, x);
        } while (!compareAndSet(prev, next));
        return prev;
    }
	...
}
案例演示
public class AtomicReferenceTest {


    public static void main(String[] args) throws InterruptedException {


        AtomicReference<Integer> ref = new AtomicReference<>(new Integer(10));

        List<Thread> list = new ArrayList<>();
        for (int i = 0; i < 10; i++) {


            Thread t = new Thread(new Task(ref), "Thread-" + i);
            list.add(t);
            t.start();
        }

        for (Thread t : list) {


            t.join();
        }

        System.out.println(ref.get());    // 打印2000
    }

}

class Task implements Runnable {


    private AtomicReference<Integer> ref;

    Task(AtomicReference<Integer> ref) {


        this.ref = ref;
    }

    @Override
    public void run() {


        for (; ; ) {

         //自旋操作
            Integer oldV = ref.get();
            if (ref.compareAndSet(oldV, oldV + 1))  // CAS操作
                break;
        }
    }
}

该案例并没有使用锁,是使用自旋+CAS的无锁操作保证共享变量的线程安全。
ABA问题和解决
CAS操作可能存在ABA的问题:
假如一个值原来是A,变成了B,又变成了A,那么CAS检查时会发现它的值没有发生变化,但是实际上却变化了。
一般来讲这并不是什么问题,比如数值运算,线程其实根本不关心变量中途如何变化,只要最终的状态和预期值一样即可。
但是,有些操作会依赖于对象的变化过程,此时的解决思路一般就是使用版本号。在变量前面追加上版本号,每次变量更新的时候把版本号加一,那么A-B-A 就会变成1A - 2B - 3A。
AtomicStampedReference
AtomicStampedReference就是上面所说的加了版本号的AtomicReference。
源码分析:
public class AtomicStampedReference<V> {


    private static class Pair<T> {


        final T reference;
        final int stamp;//加了一个版本号
        private Pair(T reference, int stamp) {


            this.reference = reference;
            this.stamp = stamp;
        }
        static <T> Pair<T> of(T reference, int stamp) {


            return new Pair<T>(reference, stamp);
        }
    }

    private volatile Pair<V> pair;

	/**
	* Creates a new {@code AtomicStampedReference} with the given
	* initial values.
	*
	* @param initialRef the initial reference
	* @param initialStamp the initial stamp
	*/
	public AtomicStampedReference(V initialRef, int initialStamp) {


		pair = Pair.of(initialRef, initialStamp);
	}
	...
}
解决ABA问题,引入了AtomicStampedReference。
AtomicStampedReference可以给引用加上版本号,追踪引用的整个变化过程,如:A -> B -> C -> D - > A,通过AtomicStampedReference,可以知道,引用变量中途被更改了3次。
但是,有时候,我们并不关心引用变量更改了几次,只关心是否更改过,就有了AtomicMarkableReference。
AtomicMarkableReference
AtomicMarkableReference和AtomicStampedReference的唯一区别就是不再用int标识引用,而是使用boolean变量——表示引用变量是否被更改过。
AtomicMarkableReference对于那些不关心引用变化过程,只关心引用变量是否变化过的应用会更加友好。
public class AtomicMarkableReference<V> {


	private static class Pair<T> {


		final T reference;
		final boolean mark;//和AtomicStampedReference区别就是用布尔值替代int
		private Pair(T reference, boolean mark) {


			this.reference = reference;
			this.mark = mark;
		}
		static <T> Pair<T> of(T reference, boolean mark) {


			return new Pair<T>(reference, mark);
		}
	}

	private volatile Pair<V> pair;

	/**
	* Creates a new {@code AtomicMarkableReference} with the given
	* initial values.
	*
	* @param initialRef the initial reference
	* @param initialMark the initial mark
	*/
	public AtomicMarkableReference(V initialRef, boolean initialMark) {


		pair = Pair.of(initialRef, initialMark);
	}
}
1.4 原子更新字段类型
种类
如果需要更新对象的某个字段,并在多线程的情况下,能够保证线程安全,atomic同样也提供了相应的原子操作类:
- AtomicIntegeFieldUpdater:原子更新整型字段类;
- AtomicLongFieldUpdater:原子更新长整型字段类;
- AtomicReferenceFieldUpdater:原子更新引用字段类型;
使用方式与限制
要想使用原子更新字段需要两步操作:
- 原子更新字段类都是抽象类,只能通过静态方法 newUpdater 来创建一个更新器,并且需要设置想要更新的类和属性;
- 更新类的属性必须使用 public volatile 进行修饰;
限制:
- 字段必须是volatile类型的,在线程之间共享变量时保证立即可见
- 字段的描述类型(修饰符public/protected/default/private)是与调用者与操作对象字段的关系一致。也就是说调用者能够直接操作对象字段,那么就可以反射进行原子操作。
- 对于父类的字段,子类是不能直接操作的,尽管子类可以访问父类的字段。
- 只能是实例变量,不能是类变量,也就是说不能加static关键字。
- 只能是可修改变量,不能使final变量,因为final的语义就是不可修改。
- 对于AtomicIntegerFieldUpdater和AtomicLongFieldUpdater只能修改int/long类型的字段,不能修改其包装类型(Integer/Long)。如果要修改包装类型就需要使用AtomicReferenceFieldUpdater。
案例演示
这几个类提供的方法基本一致,以AtomicIntegerFieldUpdater为例来看看具体的使用:
public class AtomicIntegerFieldUpdaterTest{


    private static AtomicIntegerFieldUpdater<User> a = AtomicIntegerFieldUpdater.newUpdater(User.class, "age");

    public static void main(String[] args) {


        User user = new User("conan", 10);
        System.out.println(a.getAndIncrement(user));
        System.out.println(a.get(user));
    }

    public static class User {


        private String name;
        public volatile int age;

        public User(String name, int age) {


            this.name = name;
            this.age = age;
        }

        public String getName() {


            return name;
        }

        public int getAge() {


            return age;
        }

    }

}
从示例中可以看出,创建 AtomicIntegerFieldUpdater 是通过它提供的静态方法进行创建,getAndAdd 方法会将指定的字段加上输入的值,并且返回相加之前的值。user对象中age字段原值为10,自增之后,可以看出user对象中的age字段的值已经变成了11。
